If you are a Windows user, you might have seen or heard about the infamous Blue Screen of Death (BSoD) error, which causes your computer to show a blue screen on boot and restart immediately.
The computer blue screen on startup error can often lead to valuable data loss, and fixing the error can be difficult if you’re unaware of what to do and what caused it.
So, here we’ll discuss the BSoD issue and its causes and provide some standard methods to fix the problem. We’ll also recommend a software that can be used to recover your data without needing an operating system, in case you face a blue screen on boot.
What causes Computer Blue Screen on Startup
The blue screen on startup is an error that might occur due to several issues with the system. Some of the most common problems which cause the BSoD are:
- Damaged Hardware
- Corruption in Windows Registry
- Virus Attacks
- Corrupt or outdated Drivers
- Software problems
- BIOS Settings discrepancy
- System Overheating
- Bad Power management
- Broken or corrupt Hard Disk, Motherboard, or RAM
How to Avoid Computer Blue Screen on Boot
- Regularly scan your system for viruses. Avoid clicking on unsafe websites or pop-up advertisements on the web. Install an antivirus and keep it updated. Virus attacks are one of the major causes of system crashes and BSoD errors.
- Install Windows Updates and keep all drivers up-to-date. Microsoft regularly provides Windows Patches on Windows Update, so check it at least once a week. Also, please keep all the hardware drivers updated so that they function correctly.
- Run System Memory and Hard Disk Tests. To execute a memory test, open Run Command Box by pressing Windows Key + R, enter mdsched.exe in the box, and press Enter. Then click “Restart now and check for problems,” and your system will start the process.
To execute a Hard Disk test, open This PC->Right Click on the Hard Disk->Click “Properties”-> Open “Tools” Tab->Click “Check.”
How to Fix Computer Blue Screen on Boot
If a Blue Screen appears while booting your computer, some fixes can help you out of it.
1. Rollback recent changes and updates using System Restore
(Note: Doing this will erase all data which was stored after the restore point was created. So, it is advisable to back up your data using the steps given in the next section.)
To do this, first, restart your computer. Before it starts the Booting process, repeatedly press the F8 key until the Automatic Repair window appears. Now, select Advanced Options and click on “System Restore.”
Do the steps as instructed by the system, then select a “Restore Point.” It will take some time before your system completes the process and restarts the computer.
This process will remove all the updates and new installations done after the creation of the restore point so that any update that might have caused the blue screen on startup gets removed.
2. Boot the System in Safe Mode
Press Start Button on your computer and repeatedly press F8 until a window appears. Now, select Advanced Options and click Startup Settings. Click Restart and after the reboot, select Enable Safe Mode by entering the number beside it.
Once you have booted in Safe Mode, try to identify the cause of the blue screen on normal startup. You can scan for viruses, remove them (if any), or uninstall any recently installed software that might have caused the problem. Also, you can uninstall recent driver updates from the Device Manager option in the Control Panel. (If any driver is causing the error, an error icon will be shown in the Device Manager.)
Also, make sure that your Hard disk has more than 100 MB of free space. If not, clear it. Getting out of storage can often cause the blue screen on startup. You will need to know about hard drive data recovery.
3. Repair Windows
If other fixes don’t work, you need to repair your windows. To Repair windows, you need to create a bootable USB device containing the Windows Operating System installation files using the Windows Media Creation Tool on another computer. (The steps of using the Media Creation Tool are simple and are given on Microsoft’s official website.)
After creating the tool, plug it in the faulty computer, and boot from the USB device using the BIOS settings. Now, click on the “Repair your Computer” option. Do as instructed and wait for some time before it repairs your computer.
(Note: You can also Repair startup from the “Advanced Startup” options, which can be accessed by pressing F8 while starting the computer.)
This process might cause some data to get deleted. So, it is advisable to take a backup beforehand.
How to Recover Data following the Blue Screen on Startup
Before fixing the blue screen on boot error, you need to first take a backup of the data present in your computer, in case you need to format it to fix the system.
If your system displays the blue screen on every boot and restarts by itself to continue showing the same error on the next boot, then you’re actually stuck in the boot loop and cannot turn on your computer to copy your files.
In that situation, we recommend you download and use Wondershare Recoverit data recovery software. It helps you create a Windows Preinstallation Environment bootable disk that can access the hard disk in your computer and take backup of all essential files without requiring any operating system.
Let’s quickly see how to use Recoverit to recover data.
Step 1: Download and install Wondershare Recoverit on another computer. Launch Recoverit and insert a USB Flash Drive or DVD into the system.
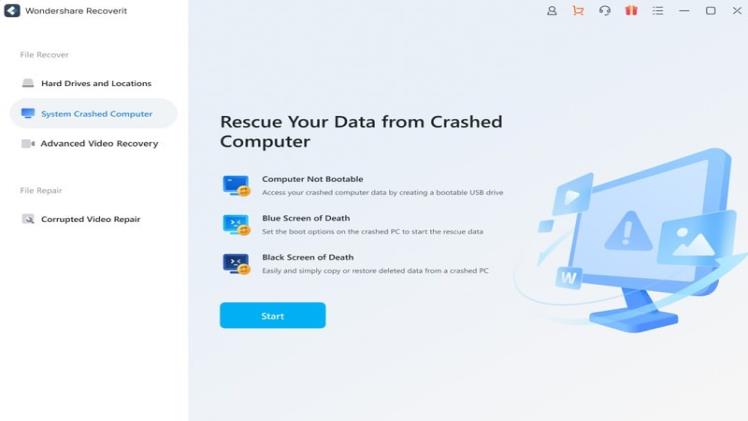
Step 2: Select the “System Crashed Computer” option from the left menu and click “Start.”
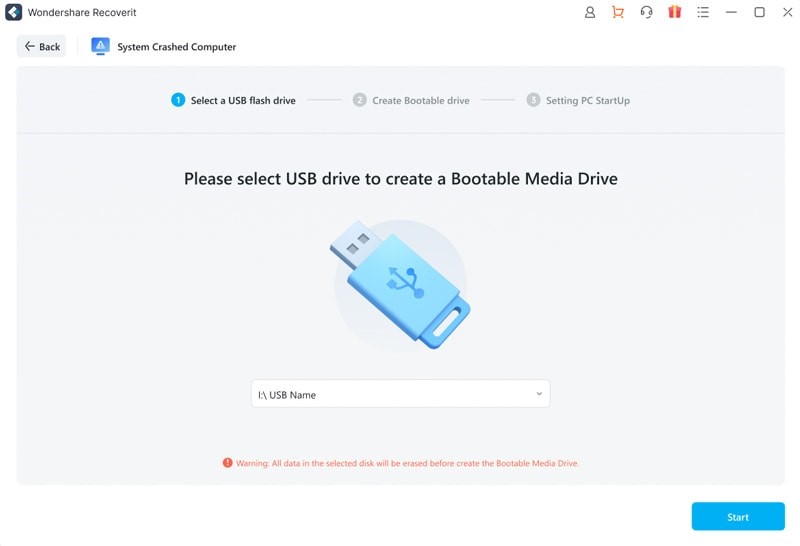
Step 3: On the next screen, select the device you want to make bootable (USB Drive or DVD) and click “Start.”
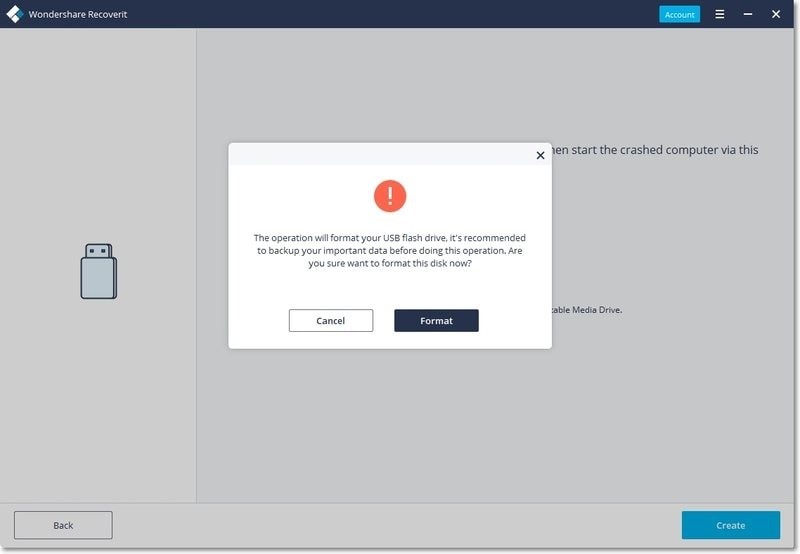
Step 4: On the pop-up window, select “Format” to erase all data on the bootable drive. (Remember to take a backup of the USB drive before formatting it).
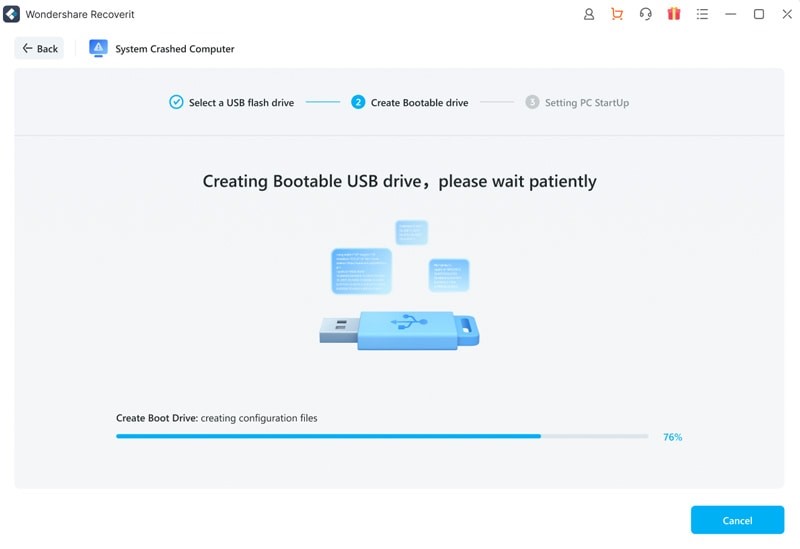
Step 5: Click on “Create” to start the process. It will take some time to create a bootable drive. Keep checking the progress bar to know when the process is complete, and until that, do not remove the USB (or DVD).
Step 6: After creating bootable drive is complete, eject it and insert it into the computer having the blue screen on boot error.
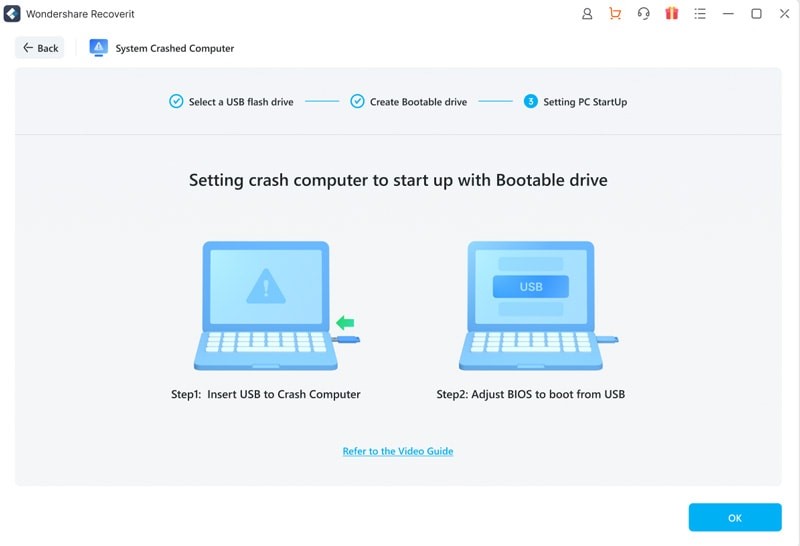
Step 7: Start the computer and open the BIOS settings (visit the system manufacturer’s website to get information about entering the BIOS settings). Usually, pressing one of these function keys – F2, F10, F12, or DEL, launches the BIOS settings. Once you’re inside the BIOS settings, navigate to the Boot Device option and select “Boot from USB” (or DVD). Save changes and restart the computer.
Step 8: The computer will show a screen after restart, having two options – “Hard Disk Copy” and “Data Recovery.” The first option copies the entire Hard Disk, and the second one enables you to select what to recover. (Here, we’ll show how to proceed with the second option.)
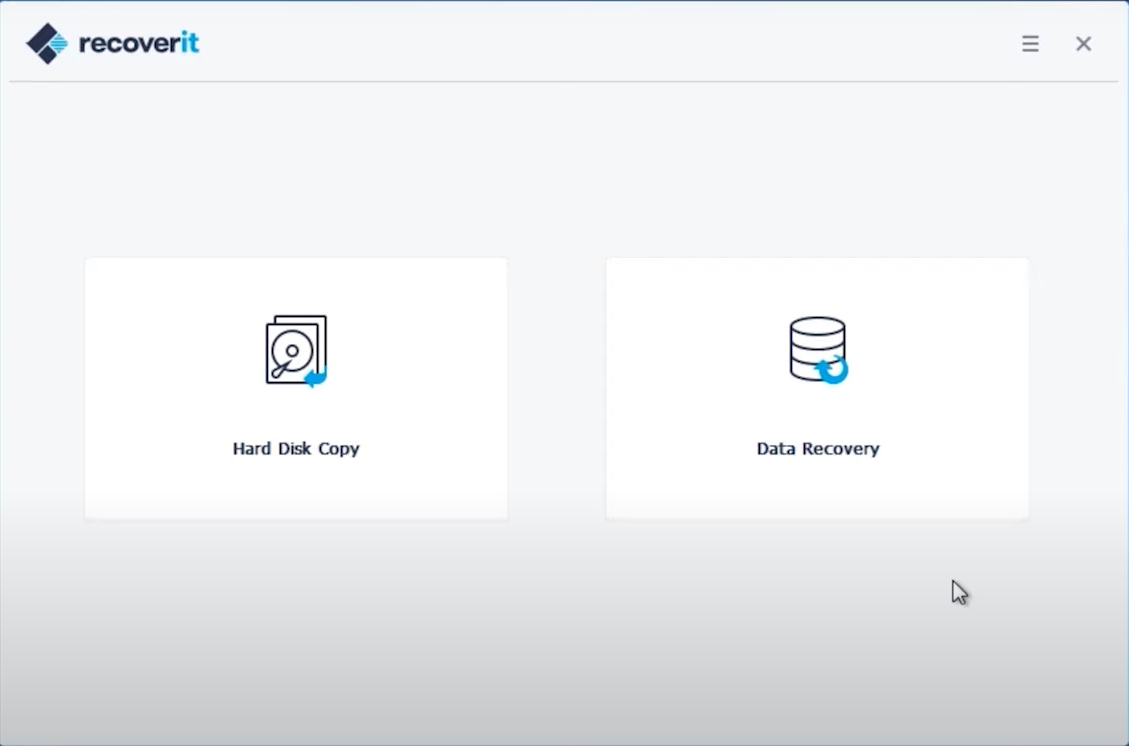
Step 9: Select the Hard Drive you want to browse for data, and click “Start.”
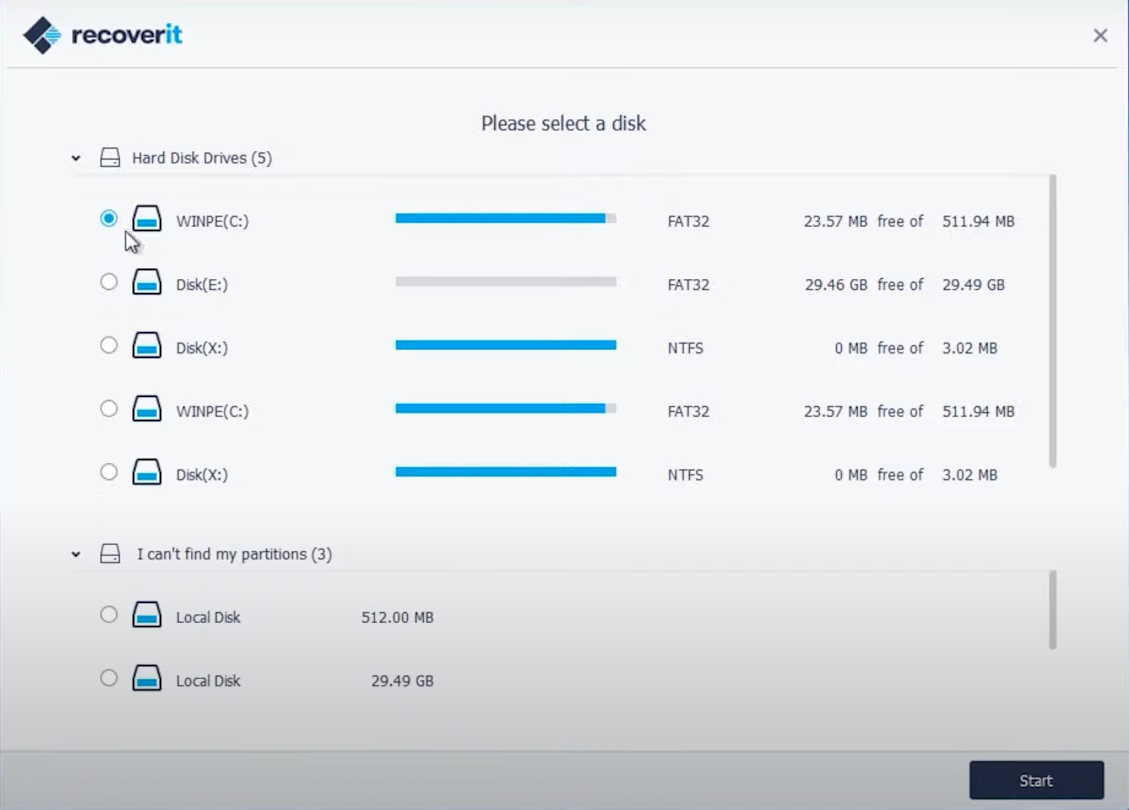
Step 10: The software will scan the drive and list all the data in it. Now, you can preview the file you want to recover and click “Recover.”

It’ll ask you for the path where you want to save it. Select an external device from the list, and the file will be saved on the drive.
Why Recoverit?
With Recoverit, you can recover lost data and files from any storage device, including photos, videos, audio, music, emails, and much more. It has a recovery success rate of 95% and can recover your files entirely.
It can recover data from Hard Drives, USB Drives, Memory Cards, Camcorders, Digital Cameras, Flash Drives, and countless other storage devices in cases of accidental deletion, drive corruption, formatting, virus invasion, or system crashes. You can Continue reading at this link Micro Center Brings Unmatched Selection
Conclusion
The Blue Screen of Death often causes valuable data loss, and recovering the data becomes a headache for the user. Wondershare Recoverit makes it easy to recover any data loss and has a high success rate of doing its job. So, this time if your computer throws a blue screen at you during the startup, then Recoverit is there to save your day.

